How to Remove Mold from Vinyl Fence A Comprehensive Guide
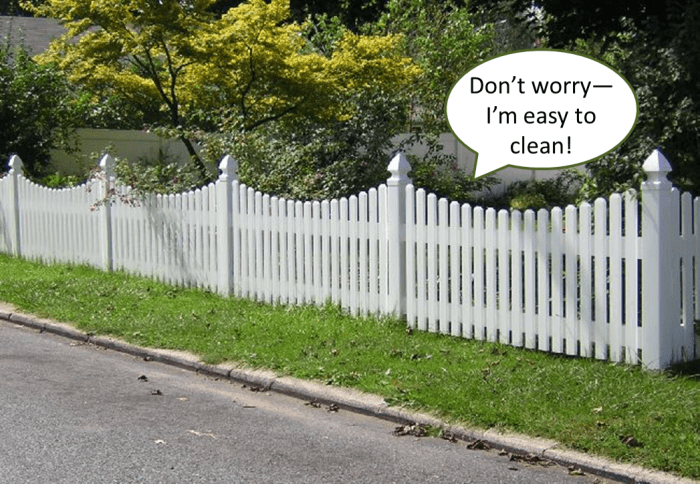
How to remove mold from vinyl fence is a common concern for homeowners. Mold growth on vinyl fences can be unsightly and even damaging over time. This comprehensive guide provides a detailed approach to identifying, removing, and preventing mold growth on your vinyl fence, ensuring a beautiful and healthy outdoor space.
The guide covers everything from identifying the tell-tale signs of mold to gathering the necessary supplies, preparing the fence, and performing the removal process. It also offers preventative measures and troubleshooting tips to keep your vinyl fence mold-free in the long run. The guide also highlights the importance of safety and proper techniques for a successful and efficient removal process.
Identifying Mold on Vinyl Fence
Mold growth on vinyl fences can be a frustrating issue, but early identification is key to effective removal. Recognizing the signs of mold helps homeowners take proactive steps to prevent further spread and maintain the aesthetic appeal of their property. Knowing the differences between mold, mildew, and dirt buildup allows for targeted and efficient treatment.
Identifying mold on a vinyl fence involves careful observation and understanding of its characteristics. Visual cues, textures, and patterns are crucial for distinguishing mold from other similar issues. By understanding the potential causes, homeowners can take preventative measures to minimize the recurrence of this problem.
Common Signs of Mold Growth
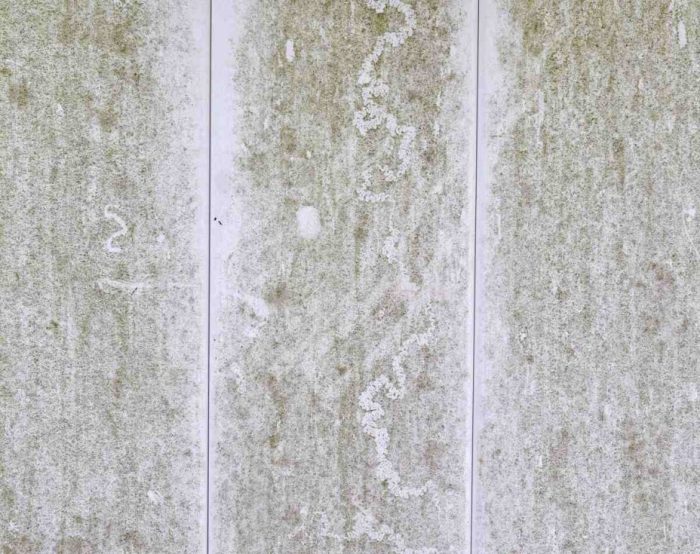
Mold on vinyl fences often displays a range of visual characteristics. It commonly appears as patches or spots of varying colors, from grayish-white to black, dark green, or even brown. The texture of mold can range from velvety to powdery. Some molds may also exhibit a fuzzy or slimy texture. Patterns may vary, but often display a blotchy or streaky appearance.
Differentiating Mold from Other Issues
It’s essential to differentiate mold from other potential issues, such as mildew or dirt buildup, which may share similar appearances. Careful observation of the affected areas is key. Mildew, for instance, typically appears as a fuzzy, grayish-white coating. Dirt, on the other hand, can manifest as a uniform layer or accumulation of debris. The consistency and texture of these issues provide crucial clues for accurate identification.
Mold, Mildew, and Dirt Comparison
The following table provides a comparison of mold, mildew, and dirt on vinyl fences, highlighting key visual cues and textures:
| Characteristic | Mold | Mildew | Dirt |
|---|---|---|---|
| Color | Grayish-white, black, dark green, brown, or various shades | Grayish-white, sometimes slightly bluish-green | Variable, often brown, gray, or black, depending on the type of dirt |
| Texture | Velvety, powdery, fuzzy, slimy | Fuzzy, powdery, sometimes sticky | Dry, granular, or sticky depending on the type |
| Appearance | Patches, spots, blotches, streaks | Patches, spots, often uniform coatings | Uniform layers, accumulations, streaks |
| Consistency | Soft, moist, sometimes damp | Soft, moist | Dry, moist, or gritty depending on the type and amount |
Potential Causes of Mold Growth
Several environmental factors can contribute to mold growth on vinyl fences. Moisture accumulation is a primary driver. Prolonged exposure to rain, condensation, or even inadequate drainage can saturate the vinyl, creating an ideal environment for mold to thrive. Poor ventilation, particularly in areas with high humidity, can also contribute. Shading and lack of sunlight, or the presence of organic matter in contact with the fence, can increase the chance of mold growth.
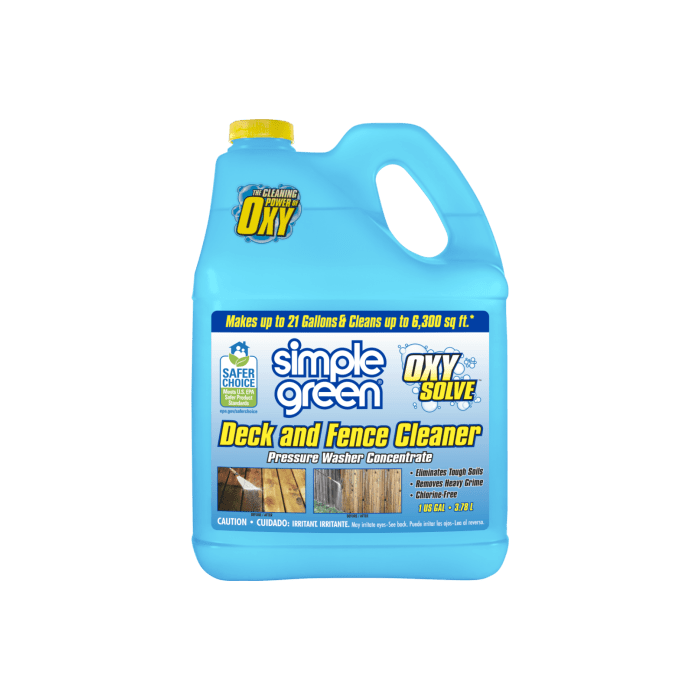
Gathering Necessary Supplies
Proper preparation is key to effectively removing mold from your vinyl fence. Having the right tools and materials, along with understanding the best cleaning solutions, will ensure a safe and successful outcome. This section details the essential supplies needed and emphasizes the importance of safety precautions.
The selection of cleaning solutions is crucial. Choosing the right solution is paramount to effectively removing the mold while minimizing damage to the vinyl fence. Safety should always be a top priority, and the use of appropriate protective gear is essential when working with cleaning agents.
Essential Tools
A range of tools will aid in the removal process. These tools help with scraping, scrubbing, rinsing, and preventing the spread of mold spores. Basic tools like a stiff-bristled brush, a scraper, and a bucket are generally sufficient. For more stubborn mold, a pressure washer might be beneficial.
Cleaning Solutions
The right cleaning solution can significantly impact the success of mold removal. It is crucial to select a solution that is effective against mold while being safe for the vinyl fence. Using a solution that’s too harsh can damage the vinyl.
Cleaning Solution Selection Table
| Cleaning Solution | Effectiveness | Safety Considerations |
|---|---|---|
| Bleach (Sodium Hypochlorite) | High effectiveness against mold. | Highly corrosive, can damage vinyl over prolonged use. Must be diluted properly. Use with caution. Wear gloves, eye protection, and a respirator. |
| White Vinegar | Effective against mold, and relatively safe for vinyl. | Less harsh than bleach, but may take longer to remove heavy mold. Wear gloves and eye protection. |
| Hydrogen Peroxide | Moderate effectiveness. Useful for light mold. | Relatively safe for vinyl, but less potent than bleach or vinegar. May require multiple applications. Wear gloves and eye protection. |
| Mild Dish Soap | Effective for removing light mold, combined with water. | Gentle, safe for vinyl. Suitable for light mold. Wear gloves and eye protection. |
Safety Precautions
Protecting yourself from harmful chemicals and mold spores is paramount. Proper safety precautions will ensure a safe and successful mold removal process. Always wear appropriate protective gear, including gloves, eye protection, and a respirator. Work in a well-ventilated area to minimize inhalation of mold spores and cleaning solutions. Dilute cleaning solutions according to product instructions, and always follow manufacturer recommendations for safe usage.
Preparing the Vinyl Fence for Cleaning
Before diving into the actual mold removal process, proper preparation is crucial for a safe and effective clean. This involves protecting surrounding areas from potential damage and assessing the extent of the infestation to determine the best course of action. A well-prepared approach will minimize the risk of spreading mold spores and ensure a thorough cleaning.
Surface Preparation
Thorough surface preparation is vital for achieving a clean and mold-free vinyl fence. This involves removing any loose debris, dirt, or other contaminants that could interfere with the cleaning solution’s effectiveness. Start by using a stiff-bristled brush or a pressure washer (at a safe setting for vinyl) to loosen and remove any dirt, mildew, or mold buildup on the fence. Ensure the surface is thoroughly rinsed with clean water. This step helps create a clean surface for the cleaning solution to adhere to, increasing its effectiveness.
Protective Measures
Protecting surrounding areas is paramount during the cleaning process. This prevents potential spills, splashes, or damage to landscaping, walkways, or other structures. Covering plants, shrubs, or delicate landscaping elements with drop cloths or plastic sheeting will prevent accidental damage from cleaning solutions. Consider wearing protective gear, such as gloves and eye protection, to safeguard yourself from potential irritants or splashes. Positioning a tarp or drop cloth below the area being cleaned can also capture any drips or spills, further minimizing damage to surrounding areas.
Assessing the Extent of Mold Infestation
Properly assessing the extent of the mold infestation is critical for determining the appropriate cleaning method. Visual inspection of the affected areas is essential to identify the severity and distribution of mold growth. Note the size and location of mold patches to gauge the amount of cleaning solution required. Determine whether the mold is superficial or has penetrated the vinyl. If the mold is extensive, or if it has penetrated the vinyl’s surface, professional assistance might be necessary to prevent further damage. For example, extensive mold growth might require more than just a simple cleaning solution and may necessitate a deep cleaning procedure or even professional mold remediation.
Pre-Cleaning Steps
A checklist of pre-cleaning steps ensures a safe and efficient cleaning process. These steps will help avoid any potential complications or setbacks during the mold removal process.
- Gather all necessary supplies: Ensure all cleaning materials, protective gear, and tools are readily available before starting the cleaning process.
- Protect surrounding areas: Cover plants, walkways, and other vulnerable areas with drop cloths or plastic sheeting to prevent damage from cleaning solutions or water.
- Inspect the fence thoroughly: Carefully assess the extent and location of mold growth to determine the best cleaning approach. Identify areas with heavy mold build-up to prioritize cleaning.
- Test cleaning solution in an inconspicuous area: Before applying the solution to the entire fence, test it on a small, hidden section to ensure it doesn’t damage the vinyl or cause unexpected discoloration.
- Prepare a safe working environment: Ventilate the area to prevent the buildup of mold spores and ensure adequate space for cleaning. Consider using a fan to improve ventilation.
Removing the Mold: How To Remove Mold From Vinyl Fence
Source: lawnstarter.com
Mold removal from vinyl fences requires a methodical approach to ensure effectiveness and safety. Improper techniques can damage the fence material or spread the mold. A thorough understanding of the process is crucial for successful mold eradication.
Safe and Effective Mold Removal Methods
Different methods for mold removal offer varying degrees of effectiveness and safety. Choosing the right method depends on the severity of the infestation and the specific characteristics of the vinyl fence.
| Method | Pros | Cons |
|---|---|---|
| Scrubbing with a stiff brush and cleaning solution | Cost-effective, relatively easy to implement, and suitable for smaller areas or less severe infestations. | Can be time-consuming for large areas, and may not be effective for deeply embedded mold. Potential for scratching the vinyl surface if not careful. |
| Pressure washing | Effective for large areas and removing loose mold. Faster than scrubbing, especially for extensive mold coverage. | Can potentially damage the vinyl fence if the pressure is too high or the nozzle is not positioned correctly. May not remove all mold, especially deeply embedded or stubborn mold. May need additional scrubbing. |
| Using a specialized mold-removing cleaning solution | Formulated to effectively target and dissolve mold. | May require additional steps for application and rinsing, depending on the solution’s properties. Solutions may be more expensive than common household cleaners. Always follow product instructions carefully. |
Application Techniques for Cleaning Solutions
Proper application of cleaning solutions is critical for effective mold removal. Applying the solution correctly ensures maximum contact with the mold and prevents damage to the fence material.
- Diluting Cleaning Solutions: Always dilute cleaning solutions according to the manufacturer’s instructions. Over-concentration can damage the vinyl and compromise effectiveness. Test the diluted solution on an inconspicuous area of the fence before applying it to the entire surface to check for discoloration or damage.
- Applying the Solution: Apply the cleaning solution evenly to the affected area using a spray bottle or a sponge. Ensure thorough coverage of the mold to maximize the cleaning effect. Avoid spraying directly from a distance, as it might not fully saturate the mold. Instead, use a sponge to ensure complete contact with the affected areas.
- Scrubbing and Brushing: Use a stiff-bristled brush or a scrubber to scrub the moldy areas. Work in small sections, ensuring that you cover the entire affected area. Use a circular motion to thoroughly loosen and remove the mold.
- Rinsing: Thoroughly rinse the fence with clean water after applying the cleaning solution and scrubbing. This removes any remaining cleaning solution and mold residue. Rinsing is crucial for preventing staining and residue buildup.
Thorough Rinsing
Thorough rinsing after cleaning is essential to prevent the formation of streaks, stains, or residue that can compromise the fence’s aesthetic appeal and durability. Proper rinsing is critical for maintaining the fence’s cleanliness and longevity.
- Using a Garden Hose: Use a garden hose with a spray nozzle to thoroughly rinse the vinyl fence. Ensure all cleaning solution and mold particles are removed from the surface.
- Checking for Residue: After rinsing, carefully inspect the fence for any remaining residue. If any residue persists, repeat the rinsing process until the surface is clean and free of any cleaning solution or mold remnants.
Maintaining a Mold-Free Vinyl Fence
Preventing mold growth on your vinyl fence requires proactive measures beyond just a single cleaning. Consistent maintenance is key to preserving the aesthetic appeal and longevity of your fence. Regular inspections and targeted actions will significantly reduce the likelihood of mold returning.
A well-maintained vinyl fence not only looks better but also enhances the overall curb appeal of your property. Mold and mildew can detract from this, so preventative strategies are essential. Understanding the causes of moisture accumulation and implementing proper ventilation are vital for a long-lasting, healthy fence.
Preventative Measures for a Mold-Free Fence
Proactive measures are essential to ward off mold growth on vinyl fences. These strategies focus on reducing the environmental conditions that encourage mold development.
- Regular Inspections: Conduct regular visual inspections of your fence, especially after periods of heavy rainfall or prolonged humidity. Early detection of moisture issues and initial signs of mold allows for timely intervention. Identifying potential problem areas, such as shaded or poorly ventilated sections, is crucial.
- Addressing Drainage Issues: Ensure proper drainage around the fence base. Standing water is a primary cause of moisture accumulation, creating a breeding ground for mold. Slope the ground away from the fence to facilitate proper water runoff. Consider installing gutters and downspouts if necessary to divert water away from the fence.
- Improving Air Circulation: Proper air circulation around the fence is vital to prevent moisture buildup. Remove any obstructions that might hinder airflow, such as dense foliage or overgrown shrubs. Ensure adequate space between the fence and any adjacent structures or plants.
Moisture Management Strategies
Moisture accumulation is a key factor in mold growth. Implementing effective moisture management strategies is crucial in preventing mold return.
- Ventilating Shaded Areas: Vinyl fences in shaded areas are particularly susceptible to moisture buildup. Install vents or gaps in the fence, or plant appropriately spaced shrubs, to improve air circulation and dry out any trapped moisture.
- Controlling Excess Water: Direct water away from the fence by properly directing downspouts or by sloping the ground. Ensure proper drainage around the base of the fence. A slightly sloped area around the base will help in water runoff, preventing puddles.
- Cleaning Regularly: Regular cleaning, as detailed in previous sections, is critical. Remove any debris or leaves that may trap moisture. This is an ongoing maintenance task.
Routine Maintenance Practices
Establishing a routine maintenance schedule will help in keeping your vinyl fence mold-free.
- Monthly Checks: Perform monthly visual inspections to identify any signs of moisture accumulation or mold growth. Pay close attention to shaded areas and corners where moisture tends to linger.
- Post-Rain Cleaning: Clean the fence immediately after heavy rainfall. Removing excess water prevents moisture from seeping into the fence material. This is a vital part of preventative maintenance.
- Trim Surrounding Vegetation: Regularly trim any vegetation growing near the fence to prevent debris accumulation and maintain good air circulation. This simple step can significantly reduce the risk of mold.
Troubleshooting and Prevention
Addressing potential issues and proactively preventing mold growth on your vinyl fence is crucial for its longevity and aesthetic appeal. Understanding the reasons behind recurring problems empowers you to implement effective solutions and maintain a healthy fence environment. Proper maintenance and a proactive approach are key to minimizing future mold occurrences.
Effective mold removal requires understanding the potential issues that can arise during the process and the underlying causes of recurring problems. Thorough inspection, coupled with preventative measures, is essential for a lasting solution.
Potential Issues and Solutions During Mold Removal
Identifying and addressing potential problems during mold removal ensures a successful outcome. Improper techniques or inadequate preparation can lead to complications.
- Mold Reappearing Quickly: If mold returns shortly after removal, the underlying cause likely remains. This could involve moisture trapped within the fence material or inadequate cleaning. Thoroughly addressing the source of moisture and ensuring complete removal of mold are vital.
- Damage to Vinyl: Aggressive cleaning agents or abrasive tools can damage the vinyl fence. Using mild, vinyl-safe cleaning solutions and gentle scrubbing techniques is essential to prevent damage. Always test cleaning agents in an inconspicuous area first.
- Staining or discoloration: Residual cleaning agents or incomplete mold removal can result in staining or discoloration. Thorough rinsing and a final inspection are crucial to ensure the fence’s appearance is restored. Rinsing thoroughly with clean water and ensuring complete drying will help mitigate this issue.
Importance of Regular Inspection
Regular inspection for early signs of mold growth is a critical preventative measure. Catching issues early allows for swift intervention, minimizing damage and preventing further spread.
Regularly inspecting the fence for any signs of discoloration, dampness, or unusual growth is essential. This includes checking areas where water might collect or linger, such as joints, corners, and shaded sections. Identifying issues early enables prompt action to prevent them from escalating. Early detection is key to preventing significant mold growth and maintaining a healthy fence.
Assessing Effectiveness of Mold Removal
A thorough assessment of the effectiveness of mold removal is vital to confirm successful treatment. Visual inspection and testing are important tools in this process.
- Visual Inspection: After cleaning, carefully examine the entire fence for any remaining mold or discoloration. Pay close attention to areas previously affected. This includes checking for any signs of moisture or water pooling. Detailed observation helps ensure complete removal and prevents recurrence.
- Testing for Moisture: If moisture is suspected as a contributing factor, use a moisture meter to check for any lingering moisture within the vinyl. This helps identify potential areas where mold may re-emerge. Addressing moisture issues is crucial for preventing recurrence.
Understanding Recurring Mold Issues
Recurring mold problems often stem from underlying causes that require attention. Addressing these causes is key to preventing future occurrences.
- Moisture Issues: Standing water or excessive moisture around the fence is a common culprit. Check for drainage problems, gutter issues, or ground water seepage. Fixing these issues is vital to prevent mold from returning. Addressing these problems prevents the recurrence of mold growth.
- Poor Ventilation: Limited air circulation in shaded or enclosed areas can contribute to mold growth. Ensure adequate ventilation around the fence to promote drying. Promoting air circulation minimizes moisture retention and mold growth.
- Blocked Gutters or Drainage: Clogged gutters or poor drainage around the fence can cause water to accumulate and increase moisture levels. Clear gutters and ensure proper drainage to prevent water from pooling around the fence. Correcting drainage problems is vital for preventing mold.
Illustrative Examples
Mold infestations on vinyl fences can vary significantly in terms of severity and location. Understanding these variations helps in selecting the appropriate cleaning method and preventing future issues. Visualizing different scenarios and successful removal methods can prove invaluable in tackling mold effectively.
Various factors influence mold growth, including environmental conditions, material properties, and the extent of exposure. These factors, when combined, can result in diverse patterns and intensities of mold growth on vinyl fences. This section provides illustrative examples to help homeowners better understand and address these issues.
Mold Infestation Scenarios
Mold growth on vinyl fences can manifest in various ways, from localized spots to extensive coverage. These scenarios differ based on the severity and location of the infestation.
- Localized Spots: Small, isolated patches of mold, often appearing as fuzzy or discolored spots, typically indicate a localized moisture issue. These can be caused by drips from a leaky gutter, a shaded area collecting water, or a recent water spill. The mold might be concentrated in one section of the fence, and can easily be treated with a targeted cleaning solution.
- Extensive Coverage: If the mold covers a significant portion of the vinyl fence, the underlying cause is likely more widespread. Possible causes include persistent moisture issues, improper drainage, or poor ventilation. In these cases, a more comprehensive cleaning approach is necessary, involving multiple applications of cleaning solution and careful attention to drainage.
- Mold at Base of Fence: Mold often develops at the base of a vinyl fence where moisture accumulates from ground runoff or pooling. This area is particularly susceptible to moisture, as it is frequently in contact with the ground. Careful cleaning and attention to drainage are crucial in addressing this type of mold growth.
Visual Representations of Mold Removal Methods
Visual representations of effective mold removal methods can assist homeowners in selecting the appropriate tools and techniques.
- Using a Pressure Washer (for extensive coverage): A high-pressure spray from a pressure washer can effectively remove loose mold and debris from larger areas of the fence. Visualize the spray nozzle being directed at the moldy section of the fence, ensuring the pressure is not excessive enough to damage the vinyl. Follow up with a cleaning solution and a soft-bristled brush for thorough cleaning.
- Using a Cleaning Solution (for localized spots): A specialized cleaning solution, mixed as directed, can be applied to the affected area. Visualize a sponge or soft-bristled brush being used to apply the solution directly to the mold. Let the solution sit for the recommended time before rinsing thoroughly with water.
- Using a Stiff Brush (for stubborn mold): A stiff-bristled brush can be used to scrub away stubborn mold. Visualize the brush being used in a gentle, circular motion to avoid scratching the vinyl. The brush should be used in conjunction with a cleaning solution to improve effectiveness.
Successful Mold Removal Projects
Illustrative examples of successful mold removal projects demonstrate the effectiveness of various methods and their outcomes.
- Project 1 (Localized Spots): A homeowner successfully removed localized mold patches on their vinyl fence using a specialized cleaning solution and a soft-bristled brush. The mold was removed in a single application, and the affected area returned to its original color and condition.
- Project 2 (Extensive Coverage): In a case of extensive mold coverage, a homeowner used a pressure washer (with appropriate precautions) and a cleaning solution to effectively remove the mold. Multiple applications were required, and the fence recovered its original appearance after thorough cleaning and drying.
Mold Appearance Under Different Environmental Conditions, How to remove mold from vinyl fence
The appearance of mold growth can vary depending on the environmental conditions surrounding the vinyl fence.
| Environmental Condition | Appearance of Mold |
|---|---|
| Shade | Mold tends to be more prominent and darker in shaded areas where moisture tends to linger. The growth may appear denser and more extensive. |
| Sunlight Exposure | Mold growth may be less pronounced in areas receiving direct sunlight, as sunlight can help dry the surface and inhibit mold growth. However, prolonged exposure to intense sunlight can still cause damage to the vinyl itself. |
Conclusive Thoughts
In conclusion, effectively removing mold from your vinyl fence requires a systematic approach, starting with identification and continuing through preparation, removal, and maintenance. By following the steps Artikeld in this guide, you can confidently tackle mold growth, restore the aesthetic appeal of your fence, and maintain its longevity. Remember, prevention is key, and regular maintenance can significantly reduce the likelihood of future mold issues.