DuraPost Installation Guide A Comprehensive Overview
DuraPost installation guide: This comprehensive guide provides a detailed walkthrough for successfully installing DuraPost systems. From initial planning and safety precautions to post-installation maintenance, we’ll cover every aspect of the process, ensuring a robust and enduring structure. We’ll explore the diverse applications of DuraPost, highlighting the different product types and their suitability for various scenarios. The guide includes practical advice, step-by-step instructions, and troubleshooting tips, making it an invaluable resource for anyone undertaking a DuraPost installation.
This guide meticulously details the entire DuraPost installation process. It covers essential prerequisites like tool selection, safety measures, and site preparation. A detailed step-by-step procedure, along with visual aids, ensures a clear understanding of each stage. We also address potential challenges and provide troubleshooting solutions to facilitate a smooth and successful installation. Finally, the guide emphasizes post-installation considerations, including inspection procedures, maintenance requirements, and tips for long-term performance.
Introduction to DuraPost Installation
DuraPost is a composite building material, primarily used for exterior framing and supporting structures. Its composite nature makes it exceptionally durable and resistant to rot, insect infestation, and extreme weather conditions. DuraPost is increasingly popular in residential and commercial construction projects, offering a long-lasting alternative to traditional lumber.
DuraPost installations are meticulously planned and executed to ensure structural integrity and aesthetic appeal. The meticulous approach to installation is crucial for maximizing the lifespan and performance of the DuraPost system. Correct installation procedures are paramount to achieve the desired results and prevent future problems.
DuraPost Material Composition
DuraPost is a composite material, typically consisting of a combination of wood fibers, polymers, and resins. This engineered blend results in a product that is exceptionally strong and resistant to environmental factors. The specific formulations may vary slightly depending on the intended application and performance requirements. Some formulations might include additional stabilizers to further enhance durability.
Common DuraPost Installation Scenarios
DuraPost is commonly used in applications requiring structural support and weather resistance. These include:
- Exterior framing for fences and decks.
- Foundation supports for houses and other structures.
- Pergolas and gazebos.
- Support beams for patios and covered walkways.
These diverse uses highlight the versatility of DuraPost. Each application demands a tailored installation process, considering the specific load-bearing requirements and environmental conditions.
DuraPost Product Types and Applications
The table below Artikels different DuraPost product types, their typical applications, and associated size ranges. Understanding these distinctions is vital for appropriate selection and installation.
| Product Type | Application | Typical Size | Notes |
|---|---|---|---|
| DuraPost Posts | Fence supports, deck posts, and general structural supports | Typically 4″ x 4″, 6″ x 6″, and 8″ x 8″ | Available in various lengths to suit the specific height requirements of the project. |
| DuraPost Beams | Supporting load-bearing elements such as roof structures and large deck spans | Sizes vary significantly based on the load capacity requirements | These beams can be custom-fabricated for specific applications. |
| DuraPost Rails | Supporting elements for railings and handrails | Usually 2″ x 4″ and 4″ x 4″ in cross-section | Railing systems are frequently customized for unique design elements. |
Prerequisites and Planning
Proper planning and preparation are crucial for a successful DuraPost installation. A well-considered approach minimizes potential issues, ensures safety, and maximizes the longevity of the installation. This section details the essential tools, safety measures, site preparation, and a pre-installation checklist to guide you through the initial stages of the project.
Careful planning and preparation are vital for a smooth and safe DuraPost installation. This ensures that the project proceeds efficiently and that the finished product meets the highest standards of quality and safety. The detailed information below Artikels the critical prerequisites and planning steps.
Essential Tools and Equipment
A comprehensive list of tools and equipment is essential for a successful DuraPost installation. Having the necessary tools on hand prevents delays and ensures that the installation process proceeds efficiently. This includes hand tools, power tools, and specialized equipment depending on the specific DuraPost model and installation method. Examples include shovels, post hole diggers, levels, measuring tapes, power drills, and impact wrenches. Specialized equipment, such as concrete mixers or post-setting equipment, may be necessary for specific applications.
Safety Precautions
Safety is paramount during any construction project. DuraPost installation is no exception. Adhering to strict safety protocols minimizes the risk of injury and ensures a safe working environment. This involves using appropriate personal protective equipment (PPE), such as safety glasses, gloves, and sturdy work boots. It is also important to consider potential hazards, such as falling objects or heavy machinery, and to take necessary precautions to mitigate these risks. Furthermore, workers should be trained on the safe handling and use of all tools and equipment. Follow all manufacturer instructions for the DuraPost system and the tools.
Site Preparation
Adequate site preparation is critical for a stable and durable DuraPost installation. Proper ground preparation ensures the longevity of the DuraPost and its structural integrity. This involves clearing the area of debris, vegetation, and rocks. The ground should be compacted to ensure a solid foundation for the posts. Soil testing and evaluation may be necessary in some cases to determine the appropriate method of soil improvement, such as adding gravel or sand. The selected site must meet all local building codes and regulations.
Pre-Installation Checklist
A comprehensive checklist streamlines the pre-installation process and helps avoid critical omissions. The checklist is tailored to facilitate a smooth and efficient installation. A well-organized checklist should cover the following:
- Site survey and assessment (including soil conditions, terrain, and local regulations).
- Procurement of all necessary materials (DuraPost components, concrete, and other supplies).
- Verification of adequate equipment and tools.
- Review of safety procedures and protocols.
- Coordination with subcontractors or other involved parties (if applicable).
- Preparation of the installation site (clearing, leveling, and compaction).
- Review of local building codes and permits.
Comparison of Installation Methods
Different DuraPost installation methods cater to various project requirements and site conditions. Choosing the right method ensures optimal results.
| Method | Advantages | Disadvantages | Suitability |
|---|---|---|---|
| Direct Embedment | Faster, cost-effective, suitable for simpler installations | Limited load-bearing capacity, requires suitable soil conditions | Ideal for smaller projects or locations with stable soil |
| Concrete Footings | High load-bearing capacity, suitable for high-traffic areas or heavy loads | More time-consuming and costly, requires more site preparation | Recommended for heavy-duty applications or locations with poor soil conditions |
| Post-Setting Equipment | Efficient, reduces manual labor, suitable for multiple posts | Higher initial investment, may not be suitable for all site conditions | Appropriate for large-scale projects or repetitive installations |
Step-by-Step Installation Guide
The DuraPost installation process, while generally straightforward, requires careful attention to detail to ensure structural integrity and longevity. This section provides a comprehensive guide, covering initial steps, component securing, system connections, and a detailed procedure. Adhering to these steps will minimize potential issues and maximize the efficiency of the installation.
This step-by-step guide provides clear instructions for installing DuraPost systems. Each step is crucial for achieving a stable and reliable structure. Following the detailed procedure, you can achieve a successful installation with minimal complications.
Initial Installation Steps
Proper preparation is essential for a successful DuraPost installation. This involves accurate site measurements, material preparation, and ensuring the designated area is free of obstructions. Before commencing installation, verify all materials are present and in good condition. Review the provided diagrams and specifications to ensure compatibility with existing infrastructure.
Securing DuraPost Components
Ensuring the secure attachment of DuraPost components is paramount for structural integrity. This involves utilizing the correct hardware, such as anchors, bolts, and specialized connectors, ensuring the appropriate torque settings are maintained. Incorrect fastening can compromise the structural integrity and lead to failure. Use high-strength fasteners and follow manufacturer recommendations to avoid future issues.
Connecting DuraPost to Other Systems
Integration with other systems, such as electrical conduits or plumbing lines, requires careful planning and execution. The DuraPost installation should account for any potential interference or strain on the system. Ensure all connections meet local building codes and safety standards. This involves meticulous planning and precise execution to avoid future complications.
Detailed Installation Procedure
- Thoroughly inspect the DuraPost components and ensure they are undamaged. Verify that all necessary hardware and tools are present.
- Carefully measure and mark the installation location. Use appropriate tools to ensure accuracy, minimizing any errors during the process. Account for expansion and contraction.
- Prepare the designated area for installation, ensuring it’s level and free from obstacles. Use a level to ensure the base is completely flat.
- Secure the base of the DuraPost using the appropriate anchors or concrete embedments. Ensure proper alignment and secure all components as directed by the manufacturer’s guidelines.
- Install any necessary supporting elements or bracing, such as brackets or reinforcement plates. This is essential for providing additional support and maintaining structural stability.
- Carefully connect DuraPost components to each other, using the correct hardware and torque settings. This step ensures a strong and reliable connection between all components.
- Inspect the completed installation for any misalignments or loose connections. Ensure that all connections are secure and meet structural requirements.
- Conduct a final inspection, checking for any potential issues. Address any concerns promptly.
Potential Challenges and Troubleshooting
Addressing potential issues proactively is crucial for a successful installation. This table Artikels common challenges and their corresponding solutions.
| Problem | Cause | Solution |
|---|---|---|
| DuraPost component damage | Shipping damage or improper handling during storage. | Inspect components before installation. Replace damaged parts immediately. |
| Inadequate anchoring | Insufficient anchoring or improper anchor type used. | Ensure correct anchoring based on site conditions and material specifications. Use appropriate anchors. |
| Misaligned components | Incorrect measurements or improper handling during installation. | Re-measure and adjust components for proper alignment. Re-secure all components with appropriate tools. |
| Connection failure | Incorrect hardware or inadequate torque settings. | Use the correct hardware and torque tools. Ensure torque settings are met as per manufacturer specifications. |
Post-Installation Considerations: Durapost Installation Guide
Completing the DuraPost installation is a significant step, but it’s equally crucial to understand and perform the necessary post-installation checks and maintenance to ensure long-term performance and structural integrity. This section details the critical follow-up steps and considerations for optimal DuraPost longevity.
Proper post-installation care extends the lifespan of your DuraPost installation. Consistent maintenance and adherence to the Artikeld procedures minimize potential issues and ensure the structural integrity of your project.
Post-Installation Checks and Inspections
Thorough post-installation inspections are vital for identifying any issues that might have arisen during the installation process. Visual inspections should encompass the entire structure, including the posts, connections, and any supporting components. Look for any signs of damage, misalignment, or gaps that could compromise the stability or longevity of the installation. Checking for proper alignment of the posts with the intended load-bearing surfaces is crucial.
Follow-up Steps After Installation
A few crucial steps follow installation to ensure the DuraPost system functions as expected. This includes ensuring all fasteners are properly tightened to the manufacturer’s specifications. Confirm that the anchoring system is secure and aligned with the structural load requirements. Verify that any necessary protective coatings or treatments are applied as specified.
Maintenance Requirements for DuraPost Installations
Regular maintenance is essential for the long-term performance and durability of DuraPost installations. This involves a combination of visual inspections and periodic cleaning. Visual inspections should cover the entire structure, including the posts, connections, and any supporting components. Look for signs of wear, damage, or corrosion. Cleaning should remove any debris or accumulated substances that could potentially affect the longevity of the structure.
Tips for Long-Term Durability and Performance
Several practices contribute significantly to the long-term performance and durability of DuraPost installations. Regular inspections are key. Inspect the posts, connections, and supporting components for any signs of wear, damage, or corrosion. Address any issues promptly to prevent further deterioration. Protecting the posts from excessive moisture is also crucial. Regular cleaning and proper sealing can help prevent damage from moisture or other environmental factors. Regularly check the anchoring system to ensure its continued integrity and stability.
Maintaining DuraPost installations involves regular visual inspections for damage, prompt repairs, and protection from environmental elements. Proper cleaning and sealing are crucial to extend the lifespan of the installation.
Illustrations and Visual Aids
Source: bigcommerce.com
Visual aids are crucial for understanding and executing a DuraPost installation correctly. Clear illustrations and diagrams significantly reduce the risk of errors and ensure a professional-quality installation. This section details various visual aids, from component diagrams to installation scenarios in challenging environments.
Comprehensive visual representations enhance the understanding of each step in the DuraPost installation process. Detailed illustrations of key components and their connections will enable installers to visualize the correct assembly and connection points. Examples of challenging installation scenarios and corresponding safety procedures will also be provided.
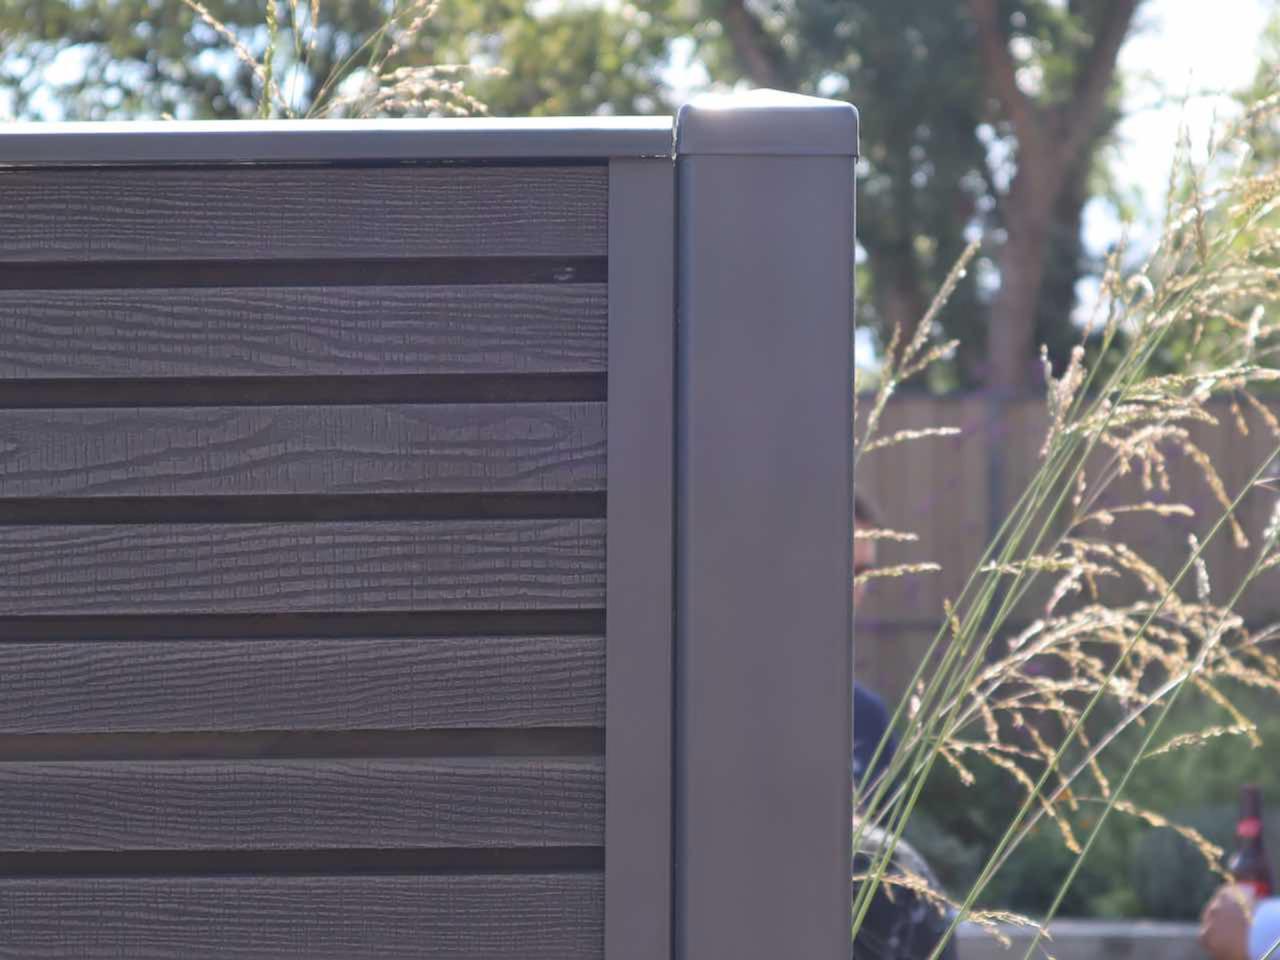
DuraPost Component Illustrations, Durapost installation guide
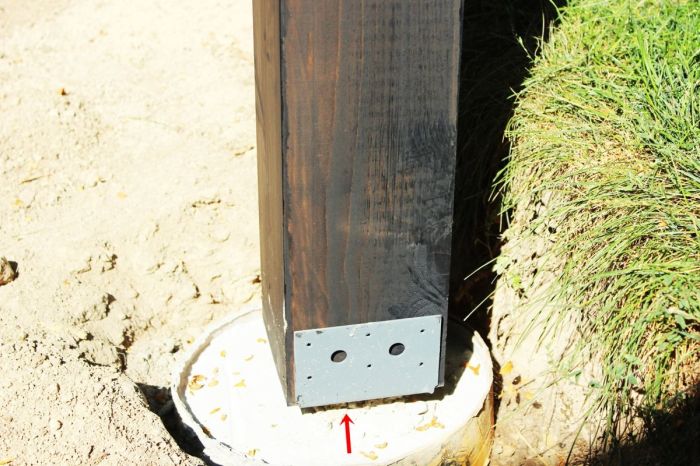
Understanding the different components of a DuraPost system is essential for proper installation. Visual representations of each component, including the post, base plate, anchoring system, and connecting hardware, will aid installers in identifying the correct parts and their specific functions. A clear diagram showcasing the interconnections between these components will further clarify the assembly process. For example, a diagram could show the post’s connection to the base plate, the base plate’s connection to the anchoring system, and the specific connection points for securing the post to the foundation.
Installation Steps with Visual Aids
Visual aids, such as step-by-step diagrams, will provide clear instructions on how to install DuraPost. These illustrations will showcase each step of the installation process, including excavation, base preparation, anchoring, post insertion, and final connections. Examples of different installation steps, from preparing the ground to the final securing of the post, should be clearly shown. Each step should be presented with a corresponding description explaining the specific actions to be taken.
DuraPost Installation in Challenging Environments
Different environments present unique challenges for DuraPost installation. Illustrations should highlight specific considerations for various ground conditions, such as soft soil, rocky terrain, or areas with varying water tables. For instance, a diagram showcasing the use of additional anchoring systems for soft soil installations or specialized drilling techniques for rocky terrain will be useful. Illustrations should demonstrate how to adjust the installation procedure to address these specific conditions.
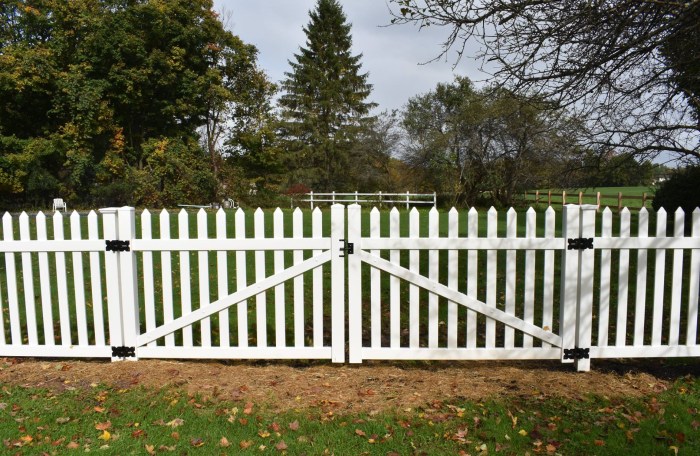
Installation Scenarios with Visual Descriptions
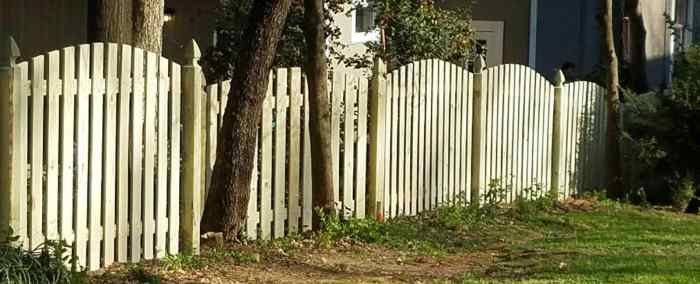
Various installation scenarios, such as installing DuraPost for fences, retaining walls, or supporting structures, will be illustrated. Examples will demonstrate the installation procedures for different scenarios, including how to adapt the standard installation process to accommodate specific needs and dimensions. For instance, diagrams showcasing fence installation, with varying post spacing and gate placement, would be valuable. Illustrations for different DuraPost applications, such as a retaining wall with multiple posts or a support structure with angled posts, will be provided.
Visual Representation of Safety Procedures
Safety is paramount during DuraPost installation. Visual aids, such as diagrams and photographs, will demonstrate the proper use of safety equipment, such as harnesses, gloves, and eye protection. The illustrations should showcase the correct procedures for lifting heavy components, handling tools, and working in close proximity to the installation site. Examples of safety precautions in different installation scenarios, like working near electrical lines or in inclement weather, will be depicted in visual form. Clear visual instructions for maintaining a safe work environment during the installation will be included.
Closing Notes
In conclusion, this DuraPost installation guide offers a complete solution for all aspects of DuraPost installation, from initial planning to long-term maintenance. The guide provides a thorough understanding of DuraPost, its applications, and the necessary steps to ensure a successful and durable installation. By following the provided procedures, you can confidently execute the installation and maintain the longevity of your DuraPost structure. Remember to prioritize safety and meticulous planning for the best results.