Installing a Split Rail Fence A Comprehensive Guide
Installing a split rail fence is a rewarding project that adds both beauty and functionality to any property. This guide provides a comprehensive overview, from planning the design and gathering materials to preparing the site and completing the installation. We’ll explore different types of materials, styles, and maintenance techniques to ensure your fence stands the test of time.
Planning is key. Careful measurement and selection of materials are crucial for a successful installation. Understanding the pros and cons of different materials, from wood to metal, is vital for long-term satisfaction. This guide provides a step-by-step approach to creating a durable and attractive split rail fence that enhances your property’s aesthetic appeal.
Planning the Fence: Installing A Split Rail Fence
A well-planned split rail fence ensures durability, aesthetic appeal, and efficient use of materials. Careful measurement, material selection, and design considerations are crucial for a successful project. This section Artikels the steps involved in planning your fence.
Measuring the Fencing Area
Accurate measurements are paramount for a precise fence layout. A detailed survey of the area to be enclosed is essential. Employ a measuring tape and stakes to mark the perimeter. Record the precise measurements of each section, noting any irregularities or changes in terrain. This meticulous approach avoids costly mistakes and ensures the fence aligns perfectly with the property lines.
Fence Materials
Various materials are suitable for split rail fencing, each with its own set of advantages and disadvantages. Common materials include:
- Wood: A traditional choice, wood split rail fencing offers a natural aesthetic. However, it requires regular maintenance to prevent decay and insect damage. Different types of wood vary in their resistance to rot and pests, impacting longevity and cost. Pressure-treated lumber is often a cost-effective solution for enhanced durability.
- Metal: Metal, particularly galvanized steel, provides superior durability compared to wood. It is resistant to rot, insects, and harsh weather conditions. The initial cost might be higher than wood, but the long-term maintenance is significantly reduced.
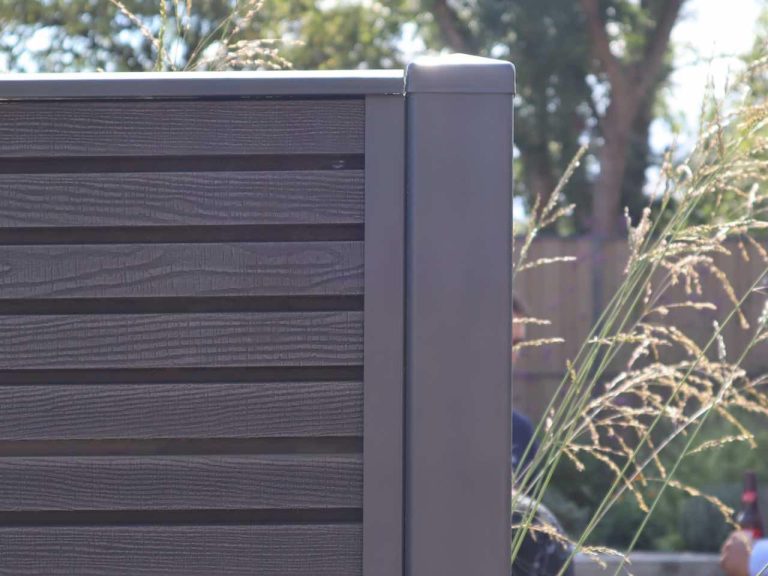
- Composite: Composite materials combine wood fibers with polymers. This creates a material that is relatively maintenance-free and resistant to rot and insect infestation. The cost typically falls between wood and metal, making it a balanced option.
Material Comparison
Factors like cost, durability, and maintenance must be considered when selecting materials.
- Cost: Wood is generally the most affordable option, while metal and composite materials have higher initial costs. However, the long-term cost of maintenance significantly impacts the overall expense. The longevity of metal and composite fences often outweighs the initial investment.
- Durability: Metal and composite materials are typically more durable than wood, resisting decay and weathering. Wood requires periodic treatments and repairs to maintain its integrity. Consider the expected lifespan of the fence when evaluating durability.
- Maintenance: Wood fences require regular staining or sealing to prevent rot and insect damage. Metal and composite fences require minimal maintenance, saving time and resources over the long term.
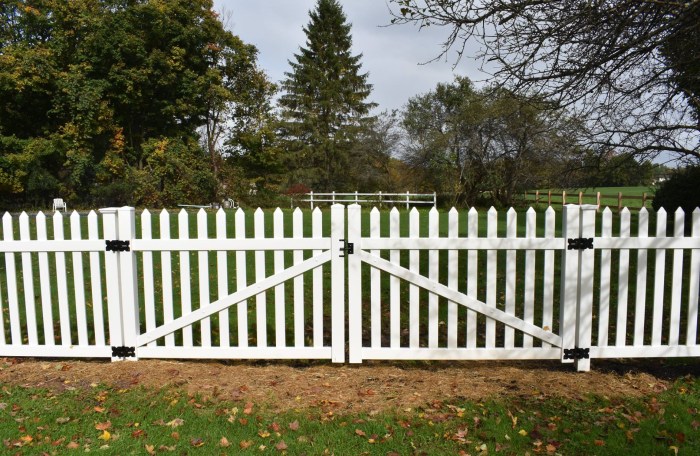
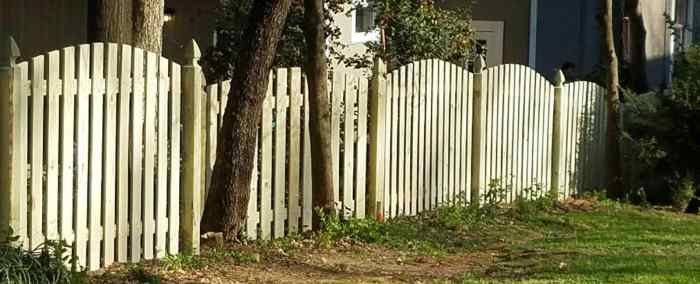
Fence Height and Style
The ideal fence height and style depend on the specific needs and aesthetic preferences of the property owner. A taller fence might be necessary for security or privacy, while a shorter fence might be preferred for a more open look. The chosen style should complement the overall landscape design.
Simple Fence Layout Diagram, Installing a split rail fence
This example shows a single-split rail fence layout for a small area:
“`
+—————–+
| | (10ft)
| Fence |
| |
+—————–+
(5ft) | | (10ft)
| |
+—————–+
(5ft) | |
+—————–+
“`
Dimensions are shown in feet. Adjust these dimensions to fit your specific property.
Fencing Styles Comparison
Different fencing styles offer varying levels of privacy, security, and aesthetic appeal.
| Fencing Style | Description | Pros | Cons |
|---|---|---|---|
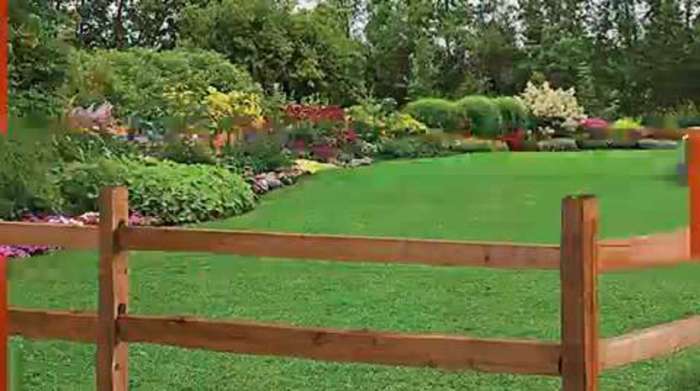
| Single Split Rail | A single horizontal rail supported by vertical posts. | Relatively inexpensive, allows for visibility. | Less privacy than other styles. |
| Double Split Rail | Two horizontal rails supported by vertical posts, creating a more substantial barrier. | More privacy and security than single split rail. | Higher cost, slightly more complex to construct. |
Gathering Materials
Securing the necessary materials is crucial for a successful split rail fence installation. Careful planning and procurement will save time and frustration during the construction phase. Understanding the required tools and materials, and the specifics of post types, will ensure a durable and aesthetically pleasing fence.
Tools Required
A comprehensive toolkit is essential for efficient fence installation. This includes but isn’t limited to a post hole digger (manual or power), measuring tape, level, post hole auger (optional), hand saw, hammer, and various screwdrivers. A post driver or impact driver can significantly reduce the time spent on driving posts. Having the right tools ensures accuracy and safety throughout the project.
Purchasing Materials
The process of acquiring lumber, posts, and rails should be approached methodically. Start by visiting local lumberyards or home improvement stores. Inquire about available lumber grades, post dimensions, and rail lengths. Obtain quotes for various quantities, and compare prices across different vendors. This ensures you get the best value for your investment.
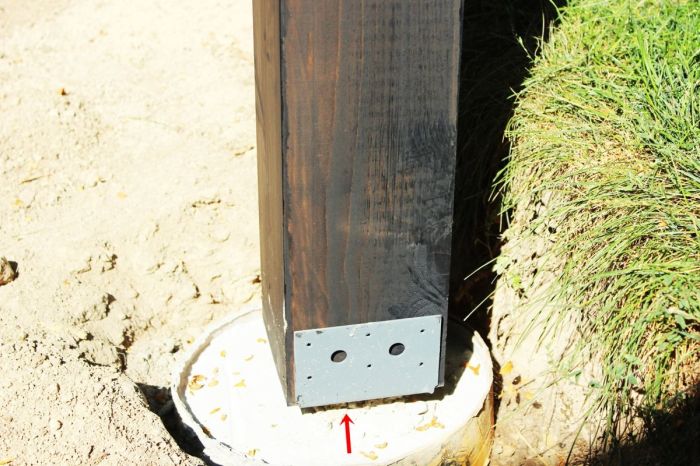
Post Options and Suitability
Post selection is critical for long-term fence stability. Pressure-treated lumber is a popular choice, providing resistance to rot and insect damage. Metal posts offer exceptional durability, especially in high-moisture or heavy-traffic areas. Concrete posts are exceptionally strong and are suitable for challenging terrains, while cedar posts offer a more natural aesthetic.
Consider the soil conditions of your property when choosing post materials. In sandy or loose soils, concrete posts or heavily reinforced pressure-treated posts are more stable. In compacted or rocky soil, pressure-treated or metal posts are often adequate. Furthermore, the post height and the fence’s overall length will impact the material needs.
Determining Material Quantities
Accurately calculating the amount of material needed is essential to avoid unnecessary purchases or shortages. Measure the entire fence perimeter, taking note of any curves or angles. Determine the desired height and spacing between rails. Consult a fence calculator or use a spreadsheet to estimate the total number of posts, rails, and other necessary materials. For example, a 100-foot fence, 4 feet tall, with 2-foot rail spacing, would require a different amount of material than a 50-foot fence, 6 feet tall, with 3-foot rail spacing.
Shopping List Template
| Item | Quantity | Dimensions/Specifications | Notes |
|---|---|---|---|
| Pressure-treated posts | [Number] | [Diameter] x [Height] | [Type of wood] |
| Rails | [Number] | [Width] x [Length] | [Type of wood] |
| Fasteners (nails, screws, etc.) | [Number] | [Type] | [Quantity per rail/post] |
| Concrete | [Number] | [Bag size/volume] | [Type of concrete mix] |
| Post hole digger | 1 | [Type] | [Manual or power] |
| Measuring tape | 1 | [Length] | [Accuracy] |
| Level | 1 | [Type] | [Accuracy] |
Preparing the Site
A well-prepared site is crucial for a sturdy and aesthetically pleasing split-rail fence. Thorough site preparation ensures the fence’s longevity and stability, minimizing future issues. This involves careful clearing, marking, leveling, and post selection, all contributing to a strong foundation.
Proper site preparation minimizes potential problems down the line. It ensures the fence is installed correctly and reliably, preventing future damage or the need for costly repairs. Careful attention to these steps will ultimately result in a fence that serves its purpose for many years.
Clearing the Area
Thorough clearing of the designated fence line is essential. This involves removing all vegetation, rocks, debris, and any other obstructions. This not only creates a smooth, level surface but also ensures proper access for digging post holes and handling materials. Clearing the area will prevent future problems.
Marking the Fence Line
Precisely marking the fence line is vital for accurate installation. Use stakes and string to define the fence’s perimeter, ensuring straight lines and consistent spacing between posts. This step is fundamental for a visually appealing and functional fence. Accurate marking prevents errors in installation and ensures the fence aligns with the desired plan.
Ground Leveling and Compaction
Achieving a level and compacted ground surface is critical for stable fence posts. Uneven ground can lead to leaning or shifting fences. Use a level and a rake to achieve a flat surface. Compacting the soil ensures the posts are firmly anchored. This is accomplished using a hand tamper or a mechanical compactor, depending on the scale of the project. Improper ground leveling can lead to uneven settlement, causing the fence to sag or shift over time.
Choosing the Right Post Type
Selecting appropriate fence posts is critical to the fence’s longevity and stability. The type of post depends on the soil conditions and the anticipated load. For instance, pressure-treated lumber is suitable for average soil conditions. Consider using metal posts for high-traffic areas or very wet locations, as these are more resistant to rot and decay. Choose the appropriate post type to match the soil conditions.
Methods of Post Setting
Various methods are available for securing fence posts. The chosen method depends on the soil type and the anticipated load on the fence.
- Concrete Footings: Concrete footings provide a strong, permanent base for fence posts. This method involves digging a hole, creating a form, pouring concrete, and allowing it to cure. This is the most common and reliable method for high-traffic or heavy-duty fences.
- Post Anchors: Post anchors offer a quicker installation alternative. These are metal devices that are driven into the ground, providing a secure hold for the posts. This method is suitable for lighter fences or when concrete isn’t practical.
Methods of Digging Post Holes
The appropriate method for digging post holes depends on the size and depth of the holes needed. Several options are available, ranging from manual digging to using specialized equipment.
| Method | Description | Pros | Cons |
|---|---|---|---|
| Manual Digging | Using shovels and other hand tools to dig the post holes. | Cost-effective, suitable for small projects. | Time-consuming, labor-intensive, and can be difficult for large projects. |
| Post Hole Digger | Using a mechanical post hole digger to excavate the holes. | Faster than manual digging, suitable for larger projects, and can handle difficult soil conditions. | Higher initial cost, potentially requiring specialized knowledge or equipment rental. |
Finishing Touches
Completing a split-rail fence involves more than just the posts and rails. The final steps, often overlooked, are crucial for the fence’s longevity and aesthetic appeal. Proper sealing and finishing protect the wood from the elements, while thoughtful choices in stain or paint enhance the fence’s visual presence.
Thorough finishing not only safeguards the investment but also contributes significantly to the fence’s overall appearance and lifespan. A well-maintained split-rail fence adds value to any property, reflecting care and attention to detail.
Finishing the Wood
Proper finishing is essential for the longevity and appearance of a split-rail fence. The selection of stain or paint plays a critical role in protecting the wood from the elements, extending its lifespan, and enhancing its aesthetic appeal.
- Staining is a popular choice for split-rail fences because it allows the natural wood grain to show through, offering a rustic and attractive appearance. Different types of wood stains offer various levels of protection and color options, ranging from transparent to rich, opaque finishes. Choosing a stain appropriate for the specific type of wood and the desired level of protection is important.
- Painting provides a more uniform color and allows for a wider range of color choices. Selecting a paint specifically formulated for exterior use is crucial, ensuring it can withstand the elements and resist fading or chipping. Apply multiple coats of paint, allowing each coat to dry thoroughly before applying the next, for optimal protection.
Importance of Sealing
Protecting the wood from moisture is critical to preventing rot and decay. Proper sealing ensures the fence resists moisture penetration, which is a primary factor in the longevity of the fence.
- Sealing the fence prevents moisture from penetrating the wood, reducing the risk of rot, warping, and insect infestation. Using a high-quality sealant, such as a penetrating wood sealer, is recommended for maximum protection. Applying multiple coats ensures complete coverage and lasting protection.
Finishing Options for Aesthetics
Different finishing options can significantly enhance the aesthetic appeal of the split-rail fence. Matching the finish to the surrounding landscaping and architectural style is crucial for a harmonious look.
- Clear Stains highlight the natural beauty of the wood. They provide a protective layer without significantly altering the wood’s appearance.
- Colored Stains allow for customization, creating a more vibrant or complementary look to the property’s aesthetic.
- Paints offer a wide array of colors, enabling the fence to match the surrounding environment or the home’s exterior design. Choosing a paint that is designed for outdoor use is critical to ensure durability.
Inspection After Installation
Regular inspection is vital for maintaining a fence’s integrity and longevity. Inspecting for damage after installation ensures issues are addressed promptly, preventing further problems.
- Checking for Damage after installation is crucial. Inspect the fence for any signs of damage, such as loose or broken rails, or damage to the posts. Address any issues promptly to prevent further deterioration.
Maintaining the Fence
Regular maintenance is essential for maintaining a split-rail fence’s appearance and structural integrity. Implementing preventative measures ensures a longer lifespan and a more attractive aesthetic.
- Cleaning the fence periodically, removing dirt, debris, and mildew, helps maintain its aesthetic appeal and prevents the buildup of harmful substances.
- Repairing any damage promptly prevents small issues from escalating into major problems. Addressing any loose or broken rails or damaged posts is vital to preserving the fence’s structural integrity.
- Re-staining/Re-painting at intervals recommended by the manufacturer or professional advice is necessary to maintain the fence’s appearance and provide ongoing protection against the elements. This usually depends on the type of finish and the environmental conditions.
Conclusion
Source: boltdns.net
In conclusion, building a split rail fence is a project that demands attention to detail, from initial planning to final finishing touches. This guide has provided a comprehensive overview of the process, highlighting essential steps and considerations. By carefully following these instructions, you can create a beautiful and functional fence that will serve your property for years to come. Remember, proper planning, material selection, and installation are crucial for a lasting and well-maintained fence.